Thursday, February 2, 2012

Hope Chest Make-Over

I had to laugh when I typed this title...on my 18th birthday I received this beloved hope chest from my parents and after I opened it my dad called it my "hopeless chest". LOL  He was a master at coming up with witty titles and slogans.  See,  I was dating Eric and by this time I think we all knew he was "the one", but my dad was probably still in denial or trying not to think about me getting married!  I can truthfully say, now that we have four girls of our own, I know how protective a father can be (though I didn't appreciate it at the time...sure wish I could tell him that).  Uggh...tears.
Alrighty then, I didn't mean to get all emotional and hadn't even THOUGHT about that story until I typed in that title. The morning of my birthday my mom asked me if I wanted anything special for dinner...I was just heading out the door for work and was feeling like this was just going to be an ordinary day.  She was a stinker though, because she had planned a big surprise deck party for me that evening!  It was so fun and it was truly a huge a surprise! I am going to ask her for pictures and will try to update this later. 
*Here are a couple from the party my mom found*
My dad's parents and my dad hiding behind the gift bag. ;)  And little Leah or perhaps Hannah?...not sure what she is doing out by the pool? Hide and seek?? ;)

Some of the best friends a girl could ask for!!  Gib cracks me up...trying to stay out of the "girl" shot. ;)  Oh, good memories!


On to my hopeless chest..when I took off the top to recover it I had to laugh...there were four or five different materials stapled to it:
Covered in sage...right before O was born.

Covered in red...

I always start into a project and then forget to take pictures!!  Here it is knob-less before painting it.

After a coat of Valspar primer and flat spray paint (it only took 3/4 can of primer and 1 can of paint!). I have lots of pink spray paint left over and I'm thinking frames or shelves...the possibilities are endless.

The minky material on top was only $8 and the paint was aprox. $6 a can so relatively a cheap face-lift.


Still have not ruled out distressing the pulls...it just makes me nervous to whip out sandpaper at this point.

Her bedding came this week and I found these prints at Lowe's that had the right colors in them!

Armoire from my mom's house!  Its perfect for her room.

Can't wait to see her in her clothes...*sigh*  Nesting at its finest. :)

Hoping to have a nursery reveal by the end of the month...paint is being purchased this weekend and hopefully white trim/board and batten will be going up soon.   We aren't in a huge rush because she will be staying in our room until the night feedings are through - oh boy- I just scared myself, this is really about to happen...

Monday, January 30, 2012

Science Experiments...

Last week we had three snow days...in a row!  I was beginning to feel like the girls needed school or some sort of learning so we turned the day into a project day.  It was fun finding random things to do and spending quality time with the girls.
C recently was asking about birthday party themes and her dad being a tease sarcastically said "I think you should do a bug party"...he was obviously trying to gross her out.  It backfired though, because she gasped and said "that's perfect!! A science party!"  lol  I have to admit I think it will be fun, I already have visions of glass measuring beakers and crazy straws for the drinks.  Dry ice will be our friend too, I am sure.
An experiment that seems to be all the rage right now with kids is this "oobleck" or "blue goo"...the stuff made out of cornstarch that is both a solid and a liquid.  We watched videos of people making pools of this stuff and being able to walk across it, but the minute you stand still you start to sink.  The girls had fun with it!
Project #1:
All you need is a box of cornstarch (16oz), some colored water (food coloring added to water), aprox. 1/2 C.  Just add the water to the cornstarch until you get the consistency you want.  It should be hard in your hand when you squeeze it and then when you let go it just drips down.  Crazy stuff!

Project #2:
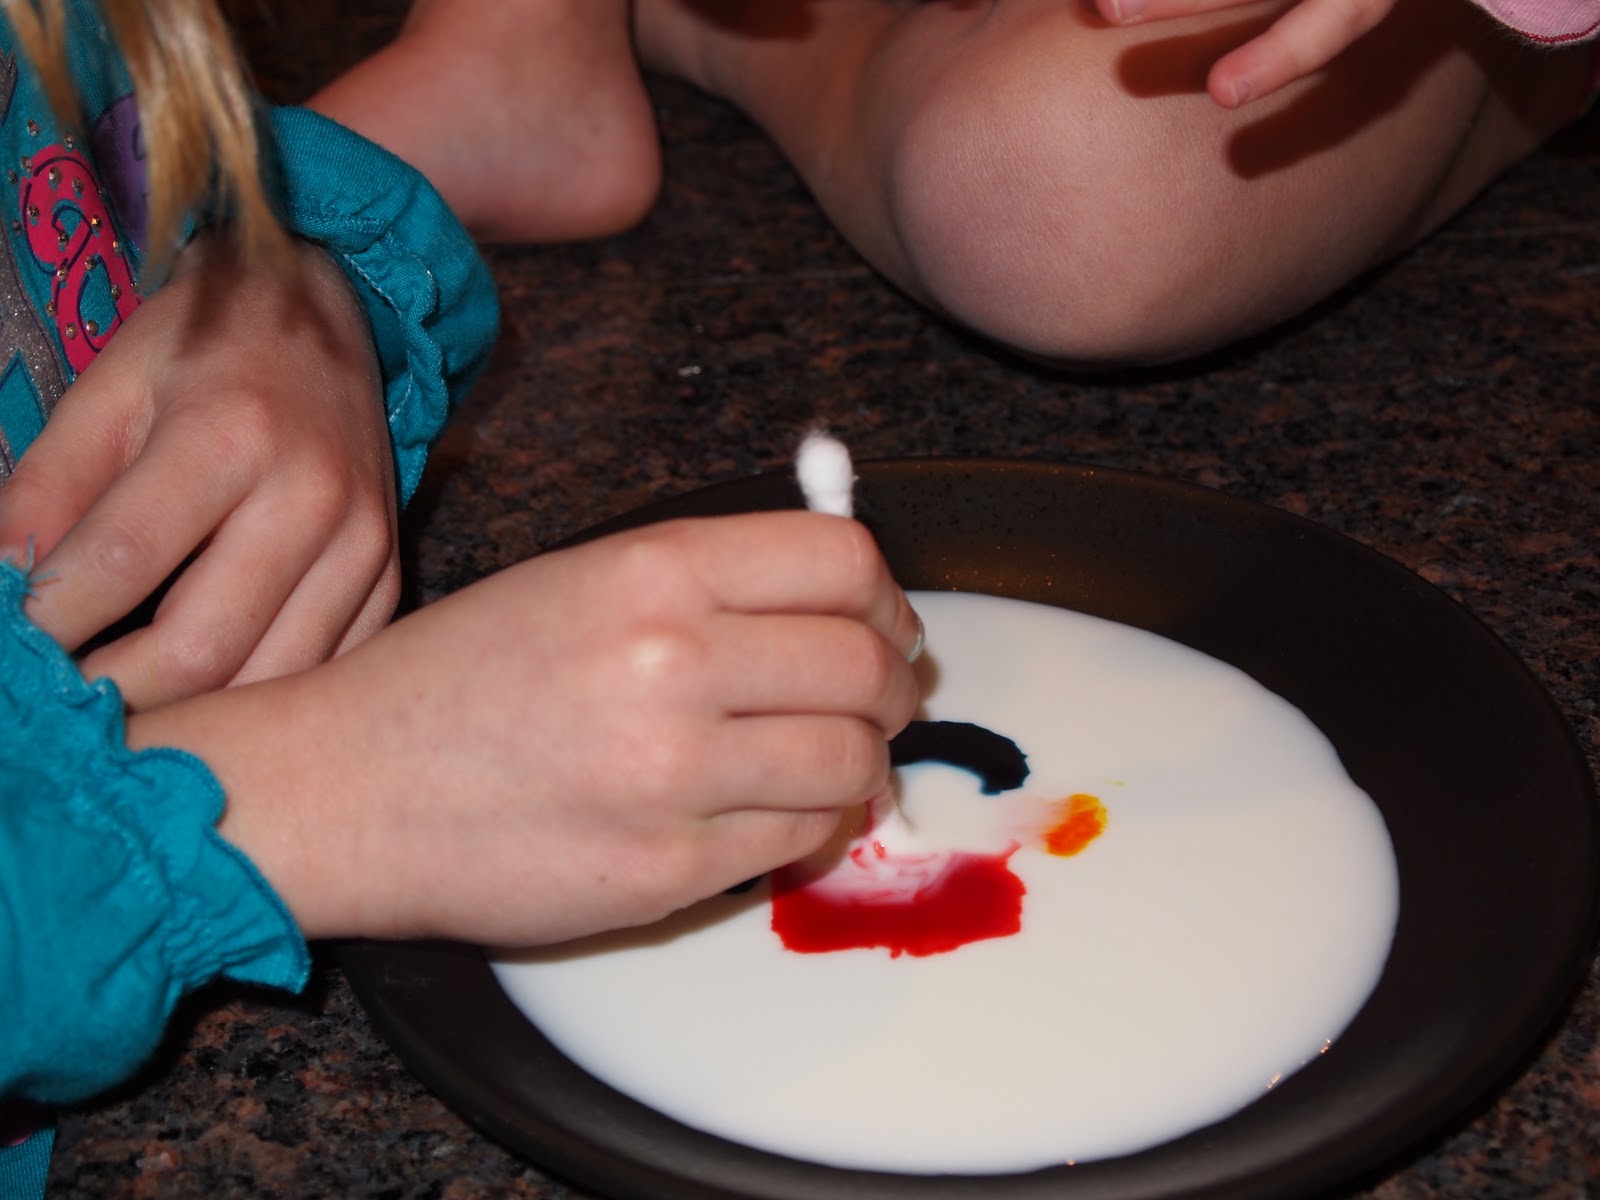
Fun and super easy (minimal ingredients).  Not even sure the name of this one...milk explosion??   

You basically put a bit of milk on a plate and add some drops of food coloring. 
 Take a q-tip and put it in the center...nothing happens.
Now put the other end of the q-tip in some Dawn dish soap and when the soap hits the milk the colors go crazy.  You don't even have to stir it.
 Ok, we are easily amused. Period.
Project #3:
I used to love to sew little things when I was little.  Those 90's hair scrunchies were a big thing and I do remember making those.  That and doing some cross stitching with my Grandma B. were the extent of my sewing capabilities.  I also remember a day we spent at my dad's mom's house (Grandma H.) and me and my sisters "helped" sew some dresses.  I remember we had to go to the gas station or grocery store for something and I insisted on wearing the dress.  Maybe my grandma will be able to remember this day more clearly...the details are fuzzy.  It was a fun day though I remember that!  Anywho...we scrounged up some material and decided to make some bean bags (since the girls were watching M's beloved Baby Songs and there was a song about the "Alphabet Bean Bag Toss").  They sewed the edges and then we filled them with beans (I feel like that is a "duuuh" description).  It has provided hours of entertainment over the last 48 hrs.  Bean bag toss, playing catch, whipping them at people, nearly breaking lamps...oh yeah, good times. *rolling eyes*
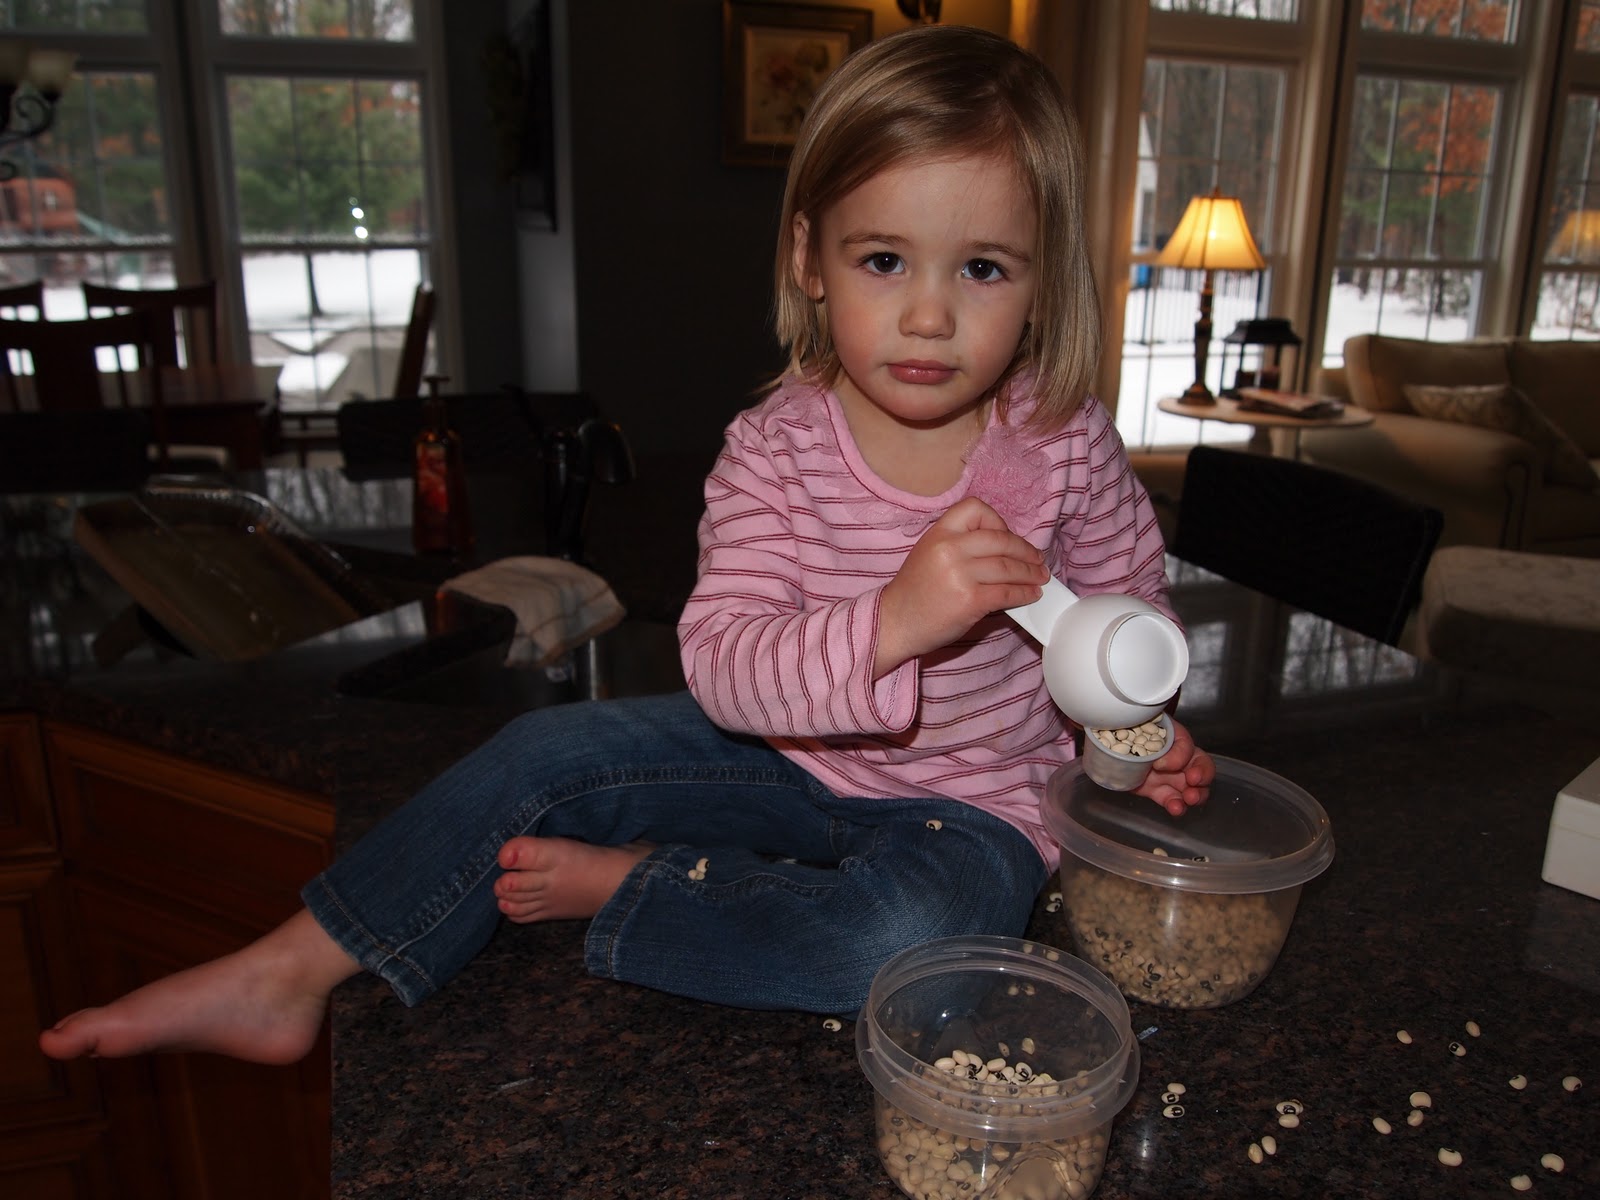
 I remember when I babysat seeing a neat idea for kids.  This mom had filled a big tote with beans and then put measuring scoops, spoons, utensils, etc. in the tote for the kids to play with the beans.  M really likes to pour things and it usually is liquid or spices or something that makes a complete mess.  The left over beans gave her a good hour of entertainment (priceless).   I didn't have enough to fill a tote, but it worked.
Funny stuff!
 She certainly keeps me on my toes...such a ham and very mischievous!! :)


Tuesday, January 24, 2012

Bathroom Remodel

Our upstairs girl bathroom was in desperate need of some finishing touches.  I have been "nesting" lately and for some reason this project trumped even the baby nursery!  Still waiting on the baby bedding which will determine the paint color, which will determine...anyways, we are waiting on the bedding.  I figure she'll be sleeping in our room for awhile anyways so I have been surprisingly laid back about the whole thing.
Back to the bathroom.  This is what the bathroom looked like when we purchased the house:
You can't see the patriotic red/white/blue eagle border near the ceiling...such a shame.  I mean, I love my country and all, but...

In a moment of impulse (and thinking we'd have time to get to the bathroom), we tore off the backsplash with the thought of tiling our own. *insert cricket noise*  Six months later our bathroom still looked like this:
We had painted it the same color as the girls room, which was also an attempt at a quick fix and it didn't look right.
Poor guy!  Projects never seem to go as smoothly as you think they will in your head!  We ended up doing some drywall repair, repainting the ceiling, removing light fixtures.  Everything has to be done in stages too which can be frustrating!  Such is the life of home renovations though!


The Final Product (as of 10pm tonight) ;)

Toyed with the idea of doing a really "girly" bathroom since we have all girls, but decided on a "spa" theme since what girl doesn't love a spa?!?!  It will grow with them and since it is also a guest bathroom it keeps a neutral feel.


It's the little things...I really love how the tile turned out!

The fixtures are the hardest thing to work around because they are not in bad shape, but the previous owners used every different metal you can think of, brass/chrome/white.  I really loved the "hot"/"cold" lettering on the knobs so we worked with these guys in mind. 

This tiling was a bonus!  Weren't planning on it, but it really tied the bathroom together...Thanks babe!!  (He is a man of many talents!)

The light fixture was brass...nothing a little silver spray paint couldn't fix! ;)


Monday, January 9, 2012

Project Girls Room

I have had an idea for the girls room since we moved and had yet to finish it until TODAY!!  I was looking for a pair of vintage/antique frames whenever I had the chance to hit up a Goodwill or a garage sale, but had no such luck.  I finally bit the bullet and bought some at Hobby Lobby.  It bugs me that I had to pay for something I was going to go home and paint/distress, but time was a factor. 
The project started like this:
 Primed (I wish I had used white primer...the gray made it turn out darker, but I had the gray on hand and used it).
 Painting raspberry red.  Two days later and four coats of paint later we got a reasonable result!


Their room is finished for now!  Woot!

Thursday, January 5, 2012

Energy Bites - After School Snack

Just thought I would share my favorite after-school snack.  I found this recipe on Pinterest and it packs in protein as well as fun (chocolate, cough, cough).  It is a very healthy alternative to granola bars and I like having control of what I put into them!

 Ingredients:
Recipe:
1 C oatmeal
1/2 C peanut butter
1/3 C honey
1 C coconut flakes
1/2 C ground flax seed (high in omega-3's for those of you that are like me and are not the biggest fish fan! Also good fiber/protein)
1/2 C mini chocolate chips
1 tsp vanilla

Mix everything together until incorporated.  Let chill for half an hour and then roll into balls and enjoy!

*I have rolled them before chilling and eaten them that way and both ways taste great; however, I've been known to not have the patience to wait for no-bake cookies either...that chilling part is hard for me! 

This will make aprox. 12 balls, I usually double the recipe.  You could also substitute raisins or dried cranberries for the chocolate chips to make it even more healthy, but if you did that don't invite me over...I wouldn't eat them.  The choc/peanut butter combo is what makes these so appealing to me! :) 

OH!! Here is a picture using the art filter on my new camera:
 I love this camera...just got it the week after Christmas (Merry Christmas to me thanks to some Christmas gifts we received!!!).  I have been deliberating over a camera for several months now and finally just bit the bullet.  I was scared about going to a D-SLR because I thought I was going to be paying for more technology than I needed and the big size really bothered me.  Found this Olympus PEN (its an in-between version with lens options that is still smallish and so far I am very happy).  It had great reviews and Costco had a kit that came with extra lenses for an awesome price.  Still have a lot to learn about the camera world...my head was spinning after reading the manual. 

Anyways, I got it the day before my nephews 1st birthday party:
He is one happy guy!
Mom and Dad with the birthday boy

 Some snow day pictures....